In my capacity as admin on a Facebook Lightroom Help group, I often come across the question of “How to do this or that…”. Most of the time it is about people that don't know where to start when they come home with a lot of images. The images end up in folders on their computers that they have no idea of, presets get applied that they have no idea of and so on. The list is endless. So is the list of solutions for each problem.
So the question is: where to start? Here’s my take on this, but your mileage may vary.
When I come home from a day’s worth of shooting, it may be 700 to 1000 images. Many of them will not make it even on to the develop table as they are blurry, ill defined or the composition is way off. Sometimes it’s simply “empty branches” as the bird flew away a split second before the shutter clicked.
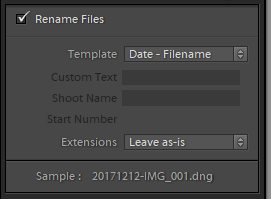
Let’s start with the import. All images go into one single folder called /photos/2017/ The image files are renamed during import using the Lightroom File Naming settings.
Upon import, I make a second copy of my files to a different drive and folder. In that way, I have a second copy if anything goes wrong. After all, power failure is not impossible. I don’t use smart previews as I don’t develop my images on my phone or a tablet. Everything is done on a dual monitor PC. Duplicates are ignored, sometimes that comes in handy if I forgot to reformat the memory card in my camera.
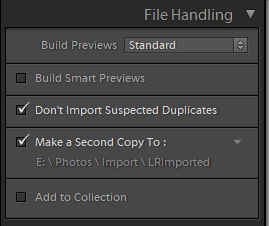
I don’t add them to a collection either as I only have one camera to shoot with. If I had multiple cameras (or multiple shooters for a wedding) then adding them to a collection will come in very handy. You can then have multiple imports ending up in the same collection for further treatment.
My file naming is very simple. Again, no multiple cameras or shooters in sight. Adding a camera name or shooter initials to the file names may come in handy in teamwork.
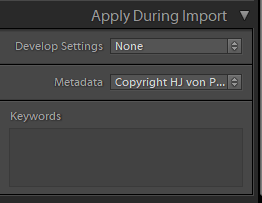
The only setting I apply during import to change the file data itself is the copyright, nothing else matters to me personally.
After that, it’s only a question of getting those pictures on the PC. I do this with the Copy or Copy as DNG options, “move” or “Add” do not suit my needs. Where do the images go?
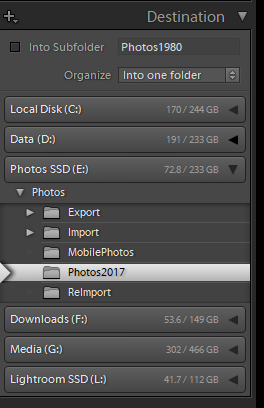
As stated before, simply into one single folder. Once they arrive there, a backup has been made of the original files, copyright has been set and I’m ready to go to work on the images. Newly imported images always end up in a temporary collection called “Previous Import”. There is no way around that and this suits me fine.
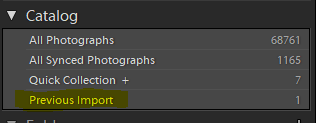
By now, I have a grid full of images that I want to look at. Now, I double click on the first image in the grid and make it fill the screen. No need to go 1:1 for now, the first pass is only to make sure the images are usable. All others will get tossed once and for all. Tossing them is done with the X key, or simply marking them for Deletion, not deleting them one by one.
Once I am through dumping, ehm, marking, all useless images for deletion, I simply press Ctrl+Backspace, or go to the Menu Photo>Delete Rejected Photos and I then select “Delete from Disk” from the final popup. Now all my duds are gone from my system.
Or are they?
Not completely.
Nothing to worry about, but they are still in the folder marked for the “Make Second copy” as my original .NEF files. No need to go and search and delete the files from there, they won’t be here for too long anyway ![]() . In fact, I will delete them in a week or so, when I am very sure I won’t be needing those anymore.
. In fact, I will delete them in a week or so, when I am very sure I won’t be needing those anymore.
End of Part one.
