Some people travel a lot and have a fairly big Lightroom Catalogue as a result. Finding those pictures can be a chore if they have not been keyworded properly. You may even have no keywords at all. So how to find those pictures that you took “some” years ago in New York? If you have geotagged your pictures, there is a very easy way to find those pictures.
Select “All Photographs” in your Library module. Then go to the Map module and zoom in on the region you want to see.
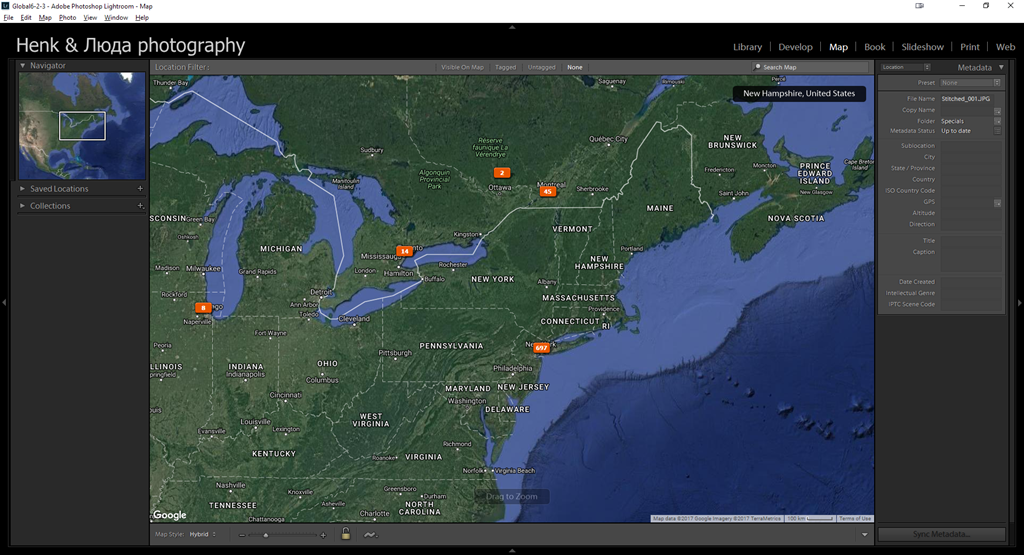
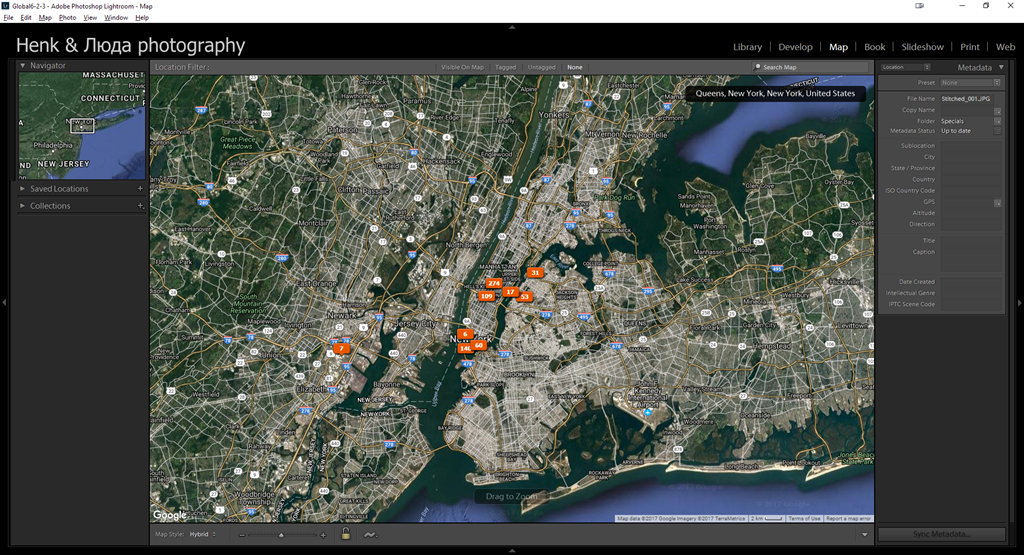
Zooming in on the 697 marker in New York will show them more spaced, visibly more “in their place”
Clicking on one of those orange “group markers” will select the corresponding pictures in the Library and in the film strip. Be aware that the filmstrip only shows a small selection of the selected pictures.
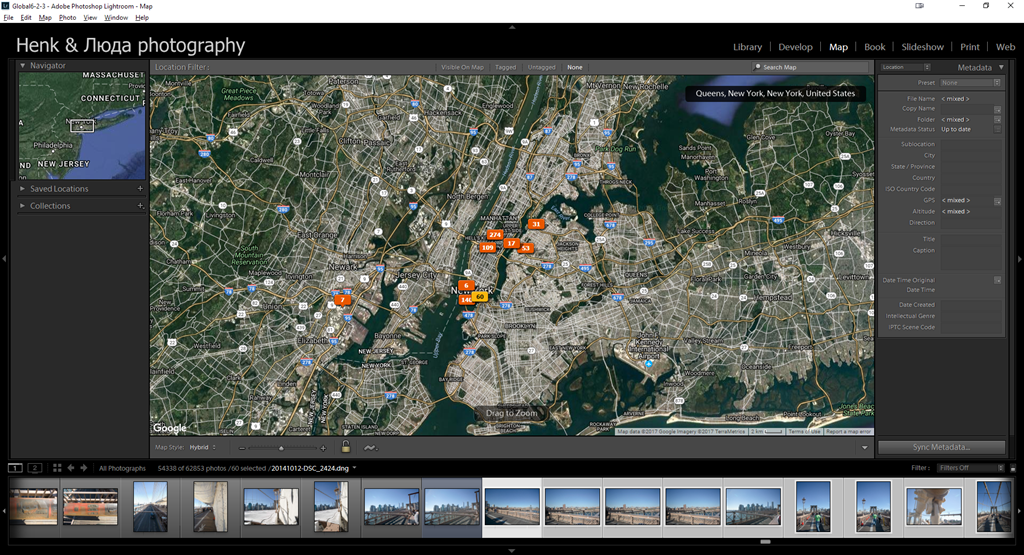
This is usually the first encounter with a geotagged set of pictures. Most tutorials will leave it at this and move on.
But there is more to say in the Map module. In the top left, you have the usual navigator in Lightroom. The Saved Locations may save you a lot of time next time you search for pictures. Remember that zooming in on your desired location? Well, we can make that easier by naming the region. All pictures, past, present and future, that fit into that region will show up when you select that region.
To create a Saved Region we need to, ehm, save it… Click the + sign next to Saved Locations.
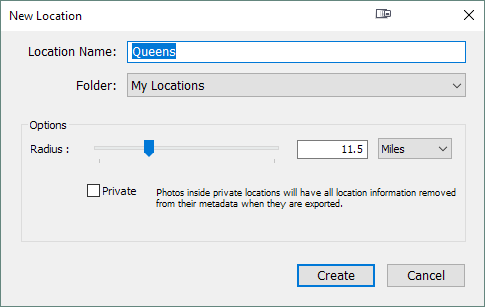
The region will be centered on the map and pre-name it for you with the location name. Nothing tells you that you need to use this, but accepting it may avoid confusion and clutter later on. To enhance privacy, the pictures inside the radius you select can have their Geotagging or Location info removed automatically when you export them. That will come in handy for pictures of your kids or your brand new big screen TV you wanted to show to the world.
The radius defined will show on your map:
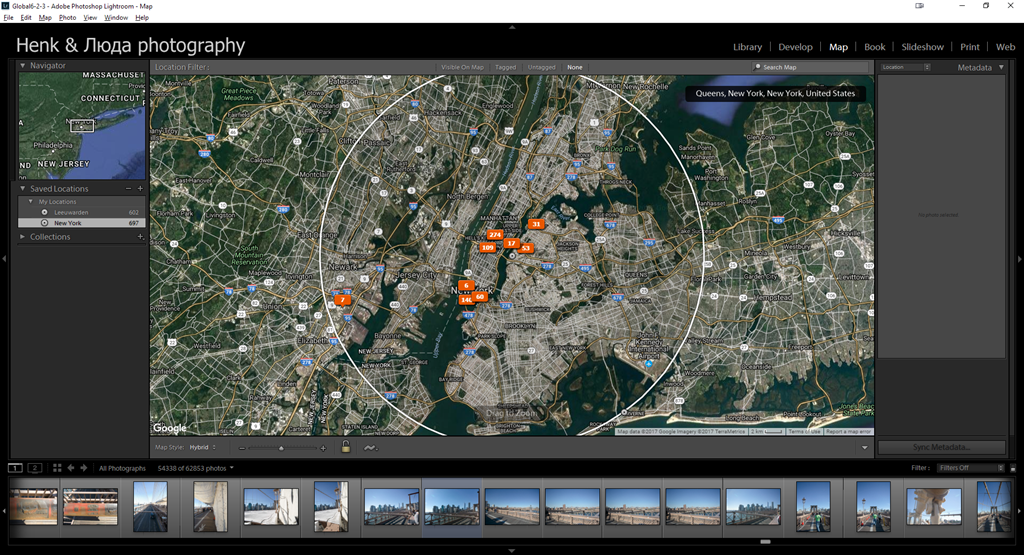
Creating more Saved Locations will make selecting pictures from any location easier. The Privacy (remove location info on export) is a nice extra benefit.
By now, most people have the following question:
How do you geotag your pictures in the map module?
There are multiple ways. The first involves dragging your pictures from the filmstrip onto the map. No GPS unit required. This works well if you know exactly where you have been. If you go on guided tours for wildlife, however, you may have no clue about your whereabouts. Some guides like to keep it that way. But you don’t have to agree with that.
Personally I have a GPS unit from Garmin, an Etrex HCx. It allows for storing of waypoints and has an interface to get them out of there in a standard .gpx file format. That standard .gpx file format is exactly what Lightroom likes to import data. Before the Garmin, I had a small datalogger that needed some file conversions before I could use it in Lightroom. The Garmin is much easier to use. Nowadays, most cellphones also allow for geotagging with Android apps like Geo Tracker. Similar apps exist for iPhone. Those apps allow for storing your tracks and exporting/sharing them later in a .gpx format. The only inconvenience is that those apps drain your phone batteries within two hours, while a dedicated GPS unit will last up to 24 hours on two replaceable batteries.
So, how do you add the gps info to your pictures? Use the squiggly menu in the Map toolbar:

and click “Load Tracklog”. A standard file list will show where you can select the gpx file from your gps device. At that point, Lightroom will read the file and reposition the map to the location(s) contained within the gpx file. The next step is to select your pictures, either in the Library module (switch to Library and come back to Map) or select them in the filmstrip. At that point, the squiggly menu allows you to “Auto-tag nn photos” and you’re done. Sometimes, photos fall outside the tracklog or you may have taken pictures when the gps unit was not running. Manual tagging is then easy by dragging the pictures onto the map.
I usually do this when I’m just done importing the pictures, so that I still have the “Previous import” collection in the Library.
So now I can see them on the private map inside Lightroom. How to show them on Google Maps? Well, Lightroom has a way to do that too. Select the pictures so that they light up in Lightroom:
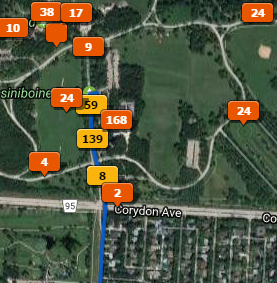
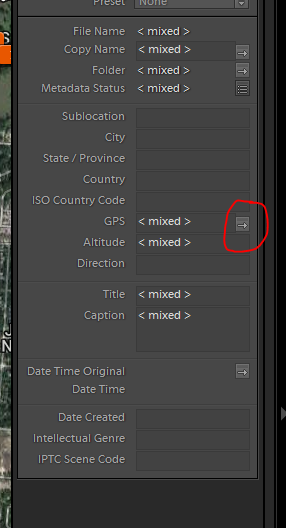
Now, go to the Metadata panel on the right and ALT/Option click on the little arrow beside the GPS coordinates:
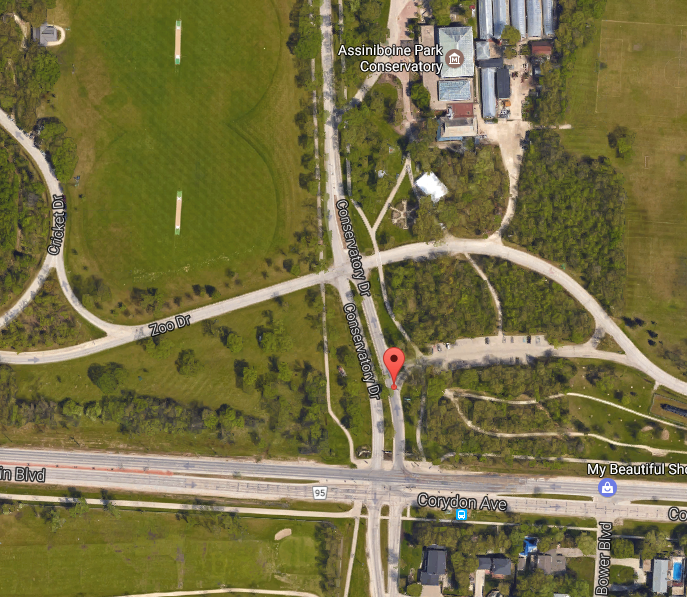
Your browser will open onto Google Maps and place a marker on it from the first picture selected in Lightroom.
These are just a few uses one can have for the Map module in Lightroom.
One important note, though… you need an active internet connection for this to work. Also, if your CC subscription is inactive, the Map module, just like the Develop module will not work.
Last but not least... your camera needs to be ON TIME to the second if you want this to work reliably!
Have fun GeoTagging!
