Using Adobe Camera Raw or Lightroom, you will have noticed the “Camera Calibration” panel at the bottom of the develop screen. I never paid much attention to it when I started using Lightroom. Mind you, I was shooting jpg at the time and the panel didn’t give me anything useful. Only “embedded”. When I started using RAW, the panel had some choices, but they looked the same as on my camera. Selecting one or another didn’t seem to make much difference apart from the colour saturation here and there.
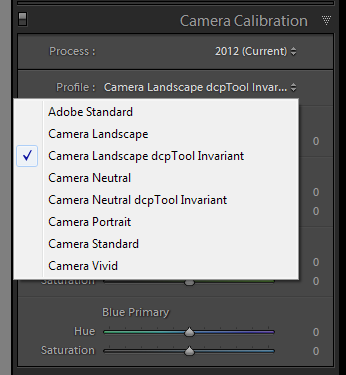
Even more, those colours seemed to shift with changing the “Basic” settings in Lightroom. I decided to leave them alone and use the “Adobe Standard” all the time.
Big mistake.
I learned later that those profiles were made exactly to shift colours, as if that were natural. Shooting two pictures with only a change in exposure, assuming you shoot semi manual at least, will produce pictures with different hues in the colours. For me that was strange and mostly unacceptable. Then I found a tool on sourceFourge that remediates that problem. See here for a better, more in-depth explanation of what the profiles do.
So I downloaded their tool to undo that twisting and turning of colours and I ended up with a new set of profiles. As you can see, I only installed the “Neutral” and the “Landscape” profiles for now. Let’s take it slow, ok?
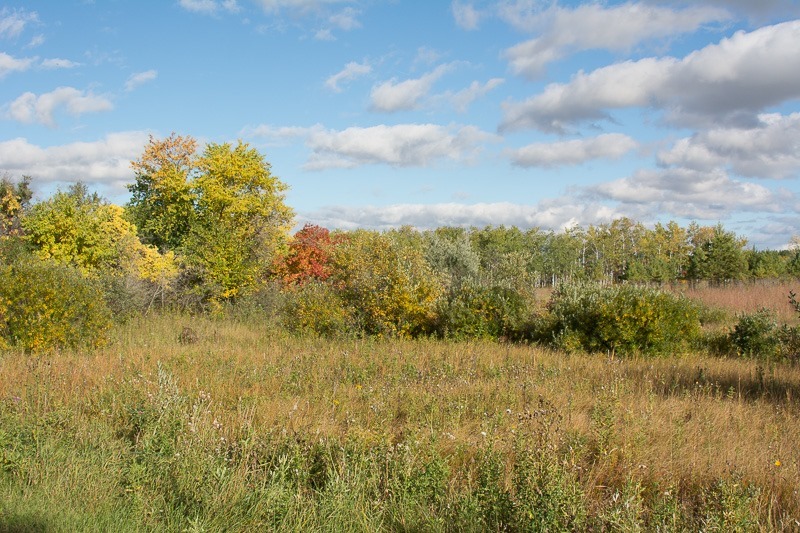
Here is a shot I took a few days ago. I tried to get the beautiful fall colours. This one is with the Adobe profile and no other modifications added. In other words, straight out of the (Adobe) camera. This was not exactly what I saw when I was there, the colours were flamboyant, not subdued as is shown here.
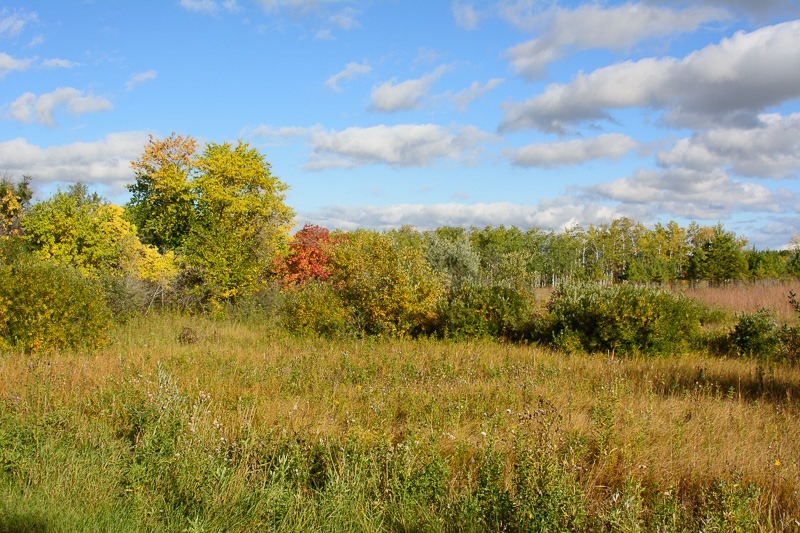
Then I applied the Camera Landscape profile to the picture. It was already better, but still not the way I wanted it. As you can see, the blue and green colours are somewhat boosted, but the sky in the middle seems to turn into a purplish colour.
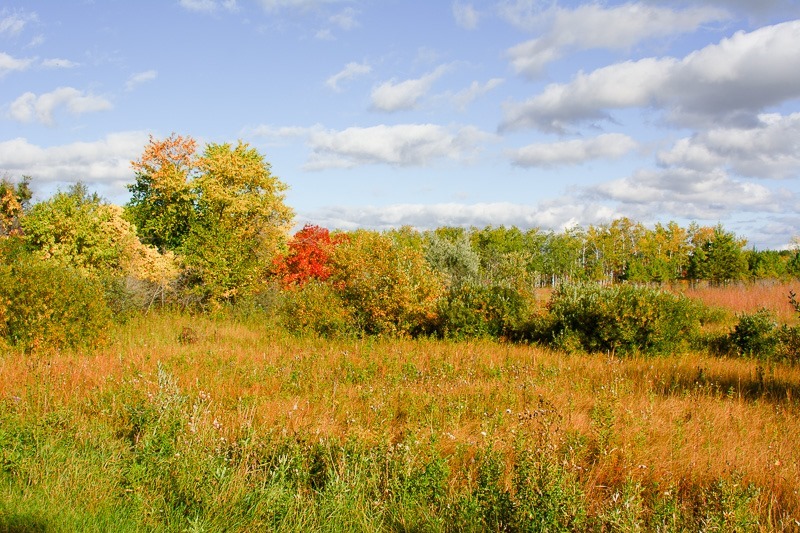
Then I applied the DCPTool Invariate profile. The sky returned to its previous colour, a little more grey-ish but the red bush at last showed up the way I saw it in the field.
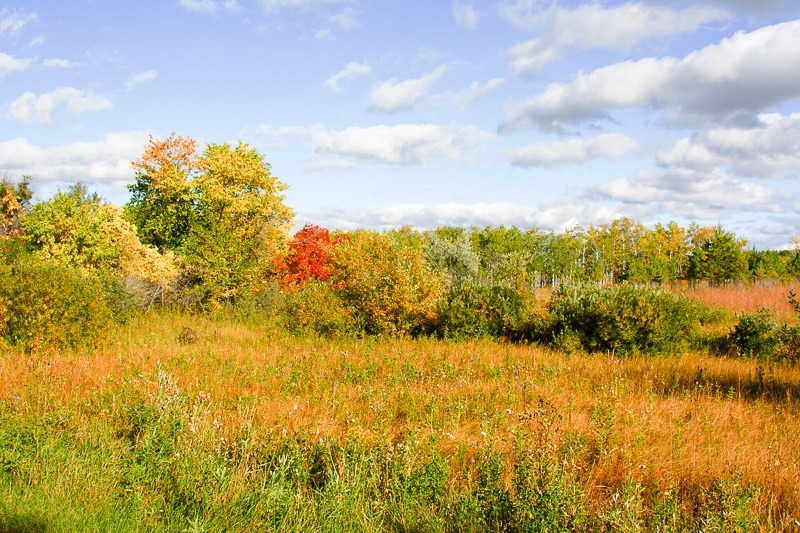
I then applied the “Auto” setting in the Basic panel, cancelled all settings except the Whites. They ended up at +40. This is pretty much like I saw it in the field.
While this Landscape profile is great for the fall colours, another profile comes in really handy.
The Camera Neutral profile.
In Summer and Winter, with lots of contrast in any picture you take outside, you end up with a “need” to use HDR, or High Dynamic Range in order to deal with the, ehm, dynamic range. Too bright highlights and too deep shadows plague you and always makes you think that your camera should be able to do better.
Sticking with the “Adobe Standard” profile will definitely boost camera sales.
However, more and more I started to use the “Camera Neutral” or more even the DCPTool Camera Neutral profile. At first, the camera Neutral profile makes your pictures look grey-ish and flat. But that is the whole point. If you look closer, you can see that lots of too deep shadows are boosted and lots of blown out highlights are subdued.
That is where the key lies. Your camera did capture the whole tonal range of your scene, but the chosen profile like “Adobe Standard” chose to blow out part of the scene in order to… what…? I don’t know.
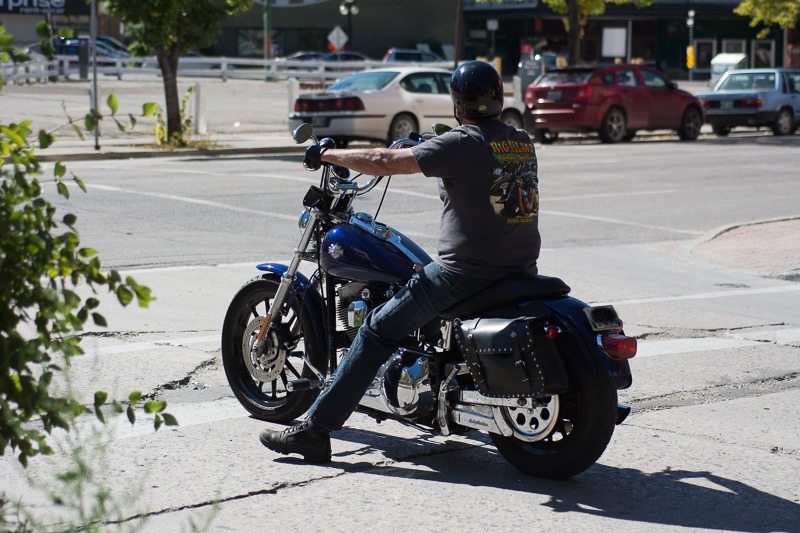
Take a look at this picture, apart from blotting out the license plate (in Lightroom), no alterations are made, the profile is “Adobe Standard”. The exposure is far from ideal and usually a picture of this “quality” heads for the recycle bin. There is no separation between the tires and the saddle bag, the saddle and the guy seem to have become one. Perhaps that’s how he likes it, but the picture would not need to show that.
In these cases, many call in a bracketed exposure and make some HDR out of it to capture the lowlights of the bike.
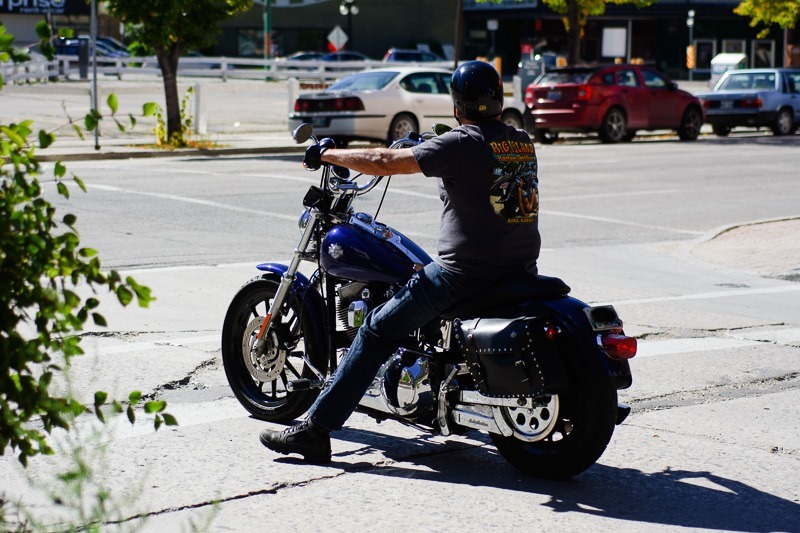
Now if you apply the Camera Neutral profile, the picture looks very different. Added a simply “Auto” in the basic panel and the picture looks like this:
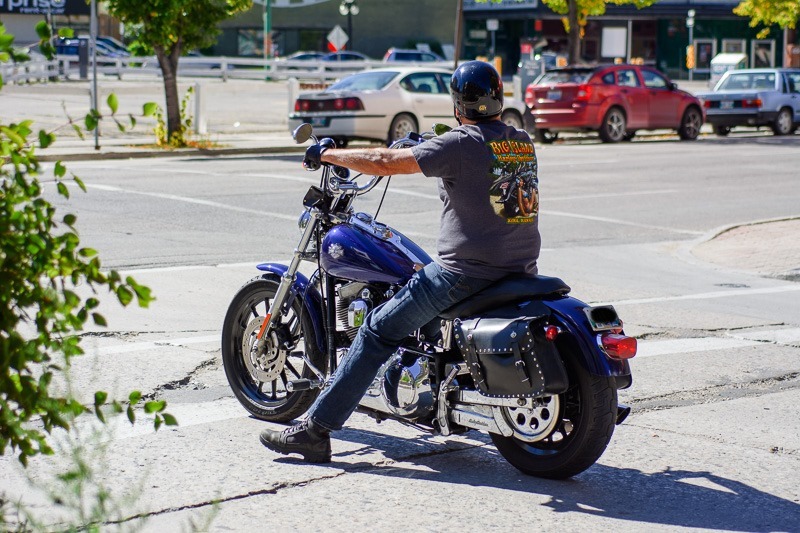
Now, the back fender pops out, exactly the way I saw it when I took the picture.
The Camera Neutral profile will, at first, throw you off with a “Yuk” kind of reaction, but it is in fact very useful. First, it flattens the whole picture, showing way more of the RAW data than any other profile. After that, you have a lot more leeway to process the picture, keeping the highlights and lowlights in check.
This season is mostly for the Camera Landscape type profiles, High-contrast seasons like the Manitoba Winter and Summer will profit enormously from your Camera Neutral profiles.
Camera profiles are specific for a camera. You will need to create your own profiles, based on the ones you already got with Lightroom or Camera Raw. The DCP Tool will then be able to untwist the hues from it and present you with an alternate version of the original profile. Install them side by side into Lightroom and you have a choice. Not all camera profiles react the same and not all will have a dramatic effect when untwisted.
Just so you know.
Of course you can also untwist the other profiles if you shoot more portraits and think your colours always need tuning in LR or ACR. Your camera provides a certain number of profiles, all replicated in Lightroom. Adding the untwisted versions adds flexibility to your processing and may save a lot of pictures from going into the recycle bin.
Happy untwisting!
